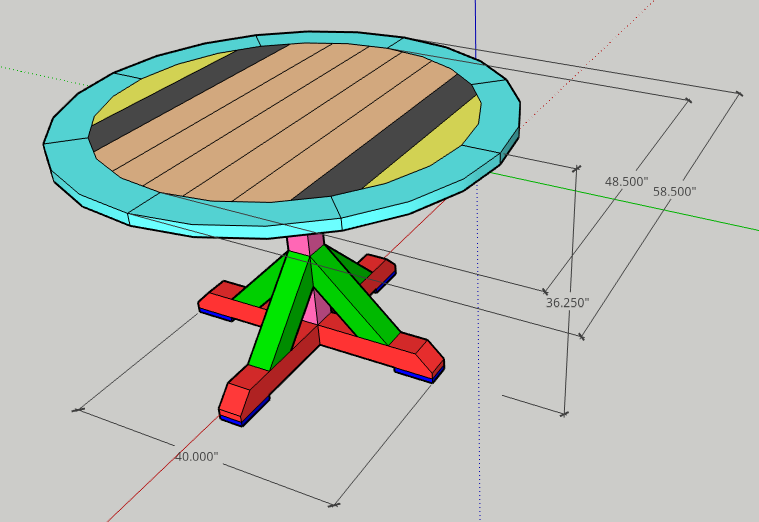
60” Round Dining Room Table with Pedestal Base
Step by step instructions on how to make a 60” Round Table with Breadboards.

Overview
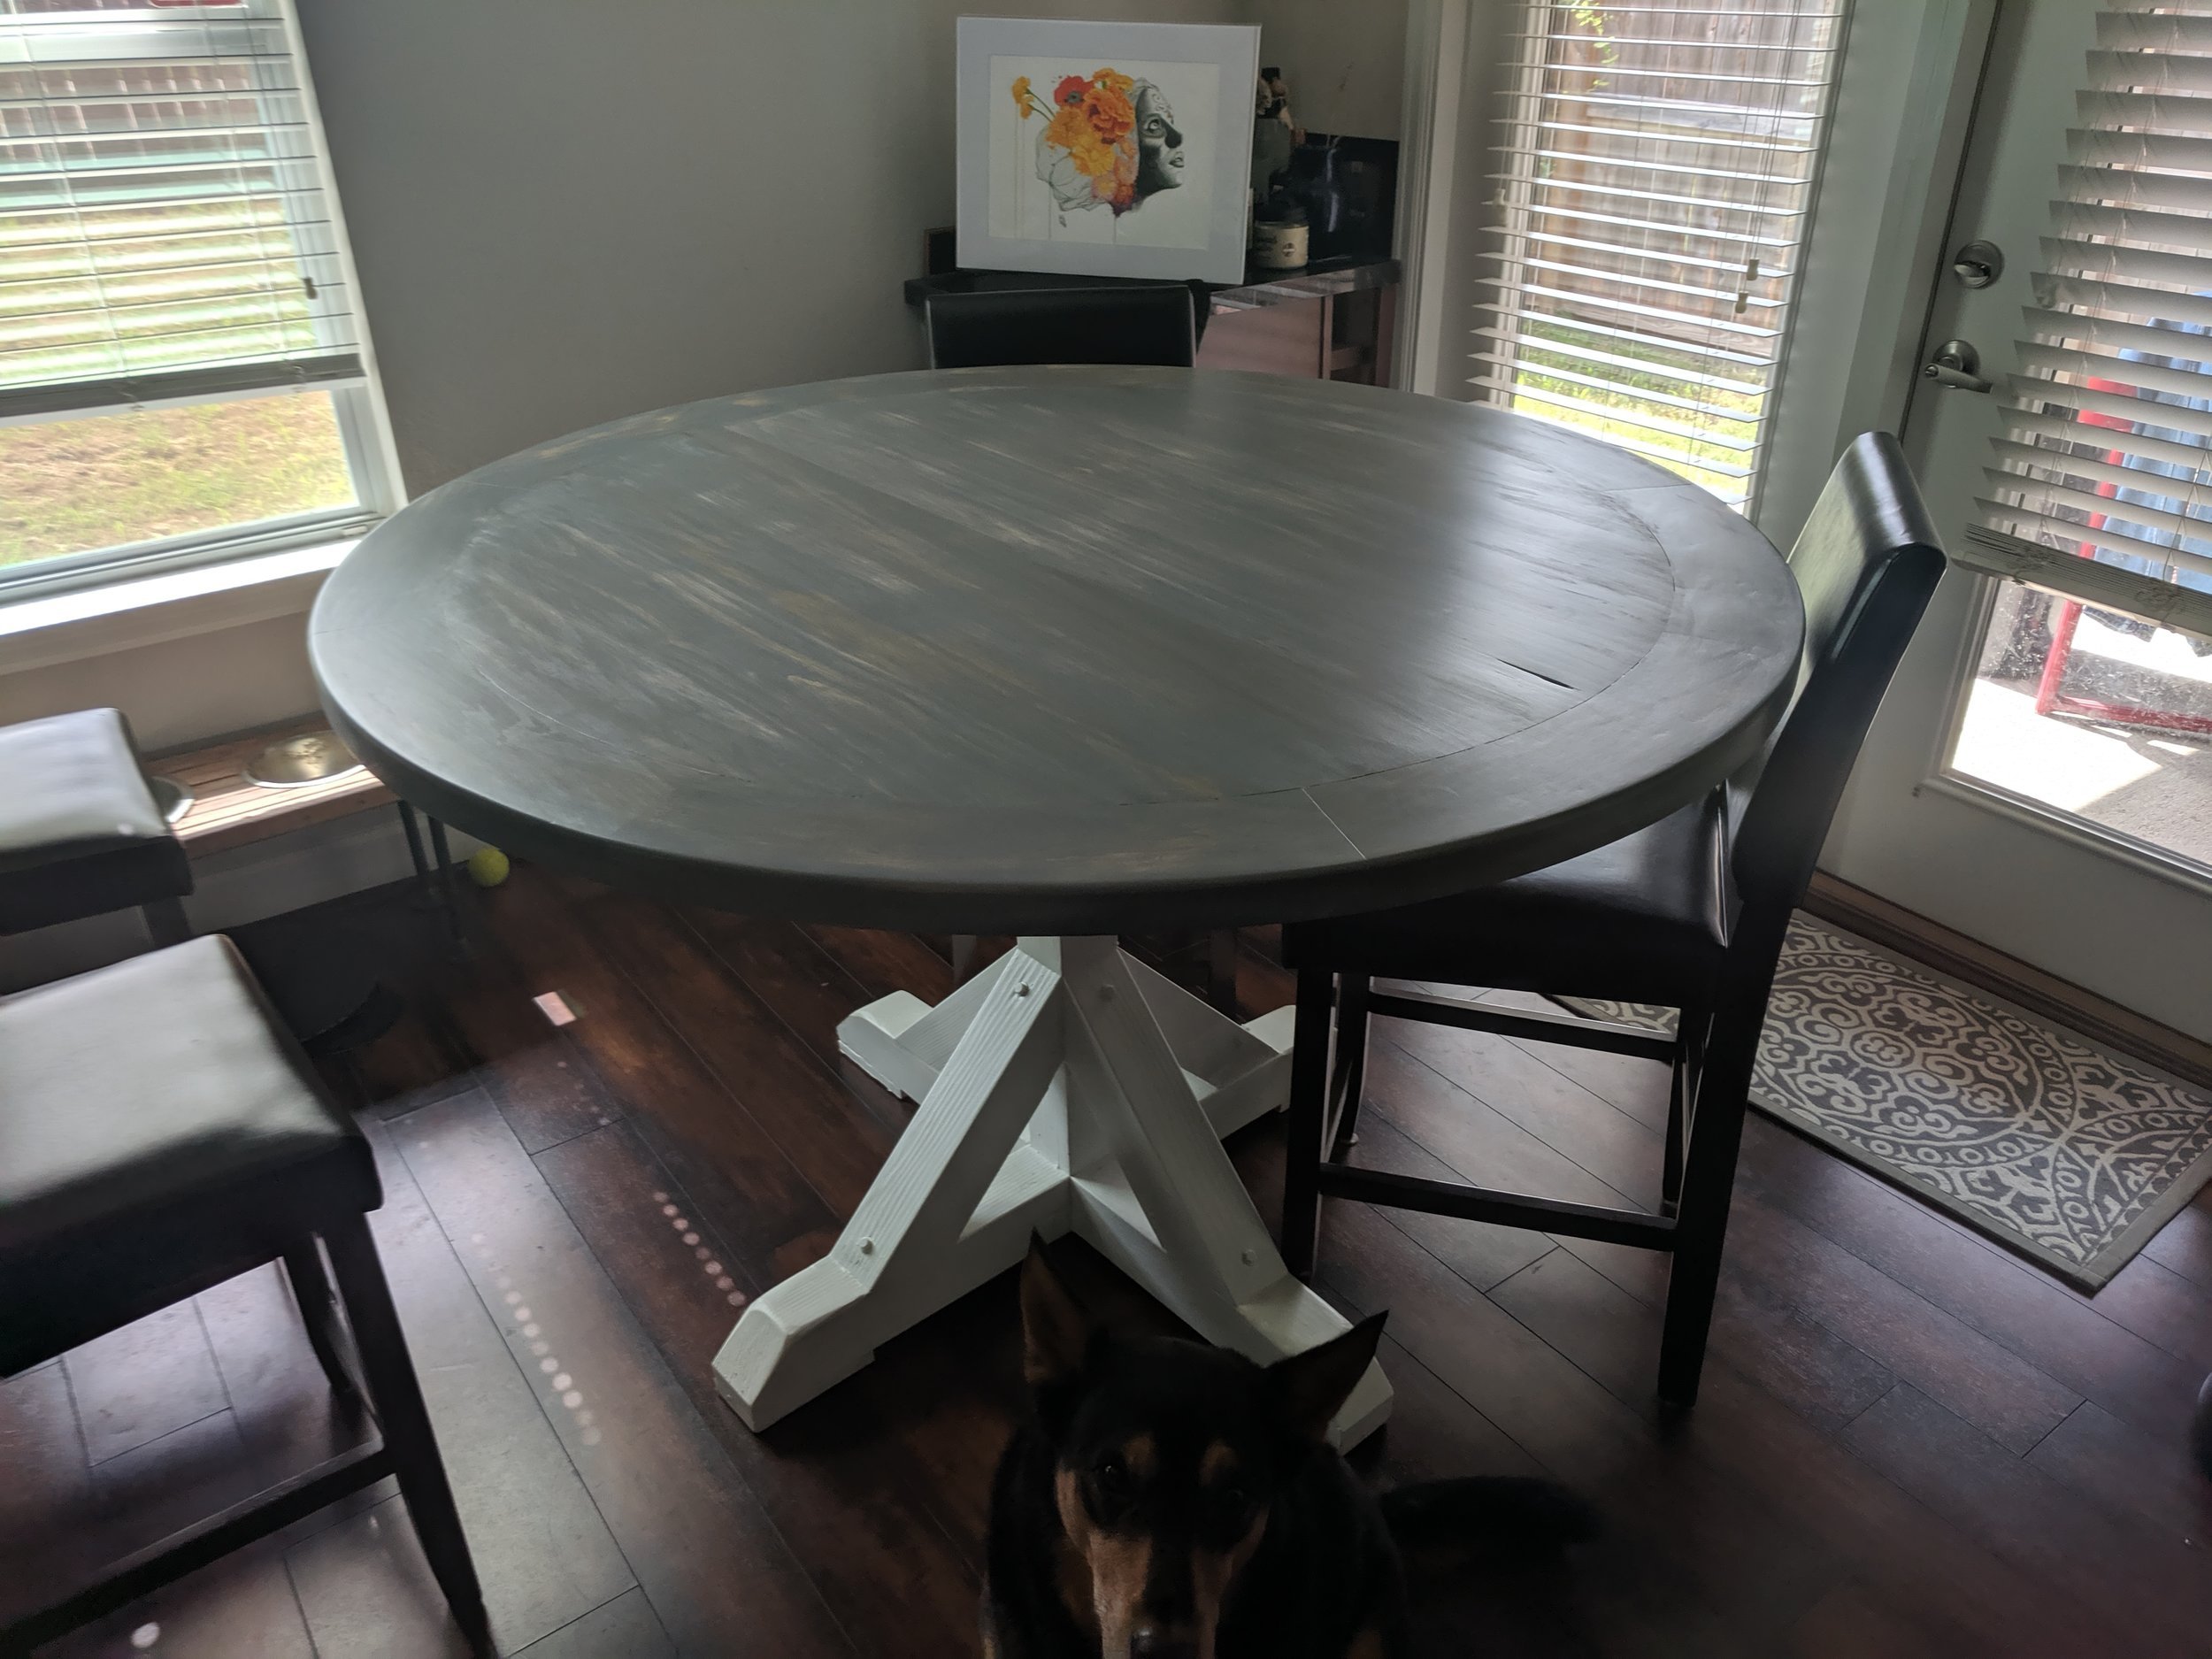
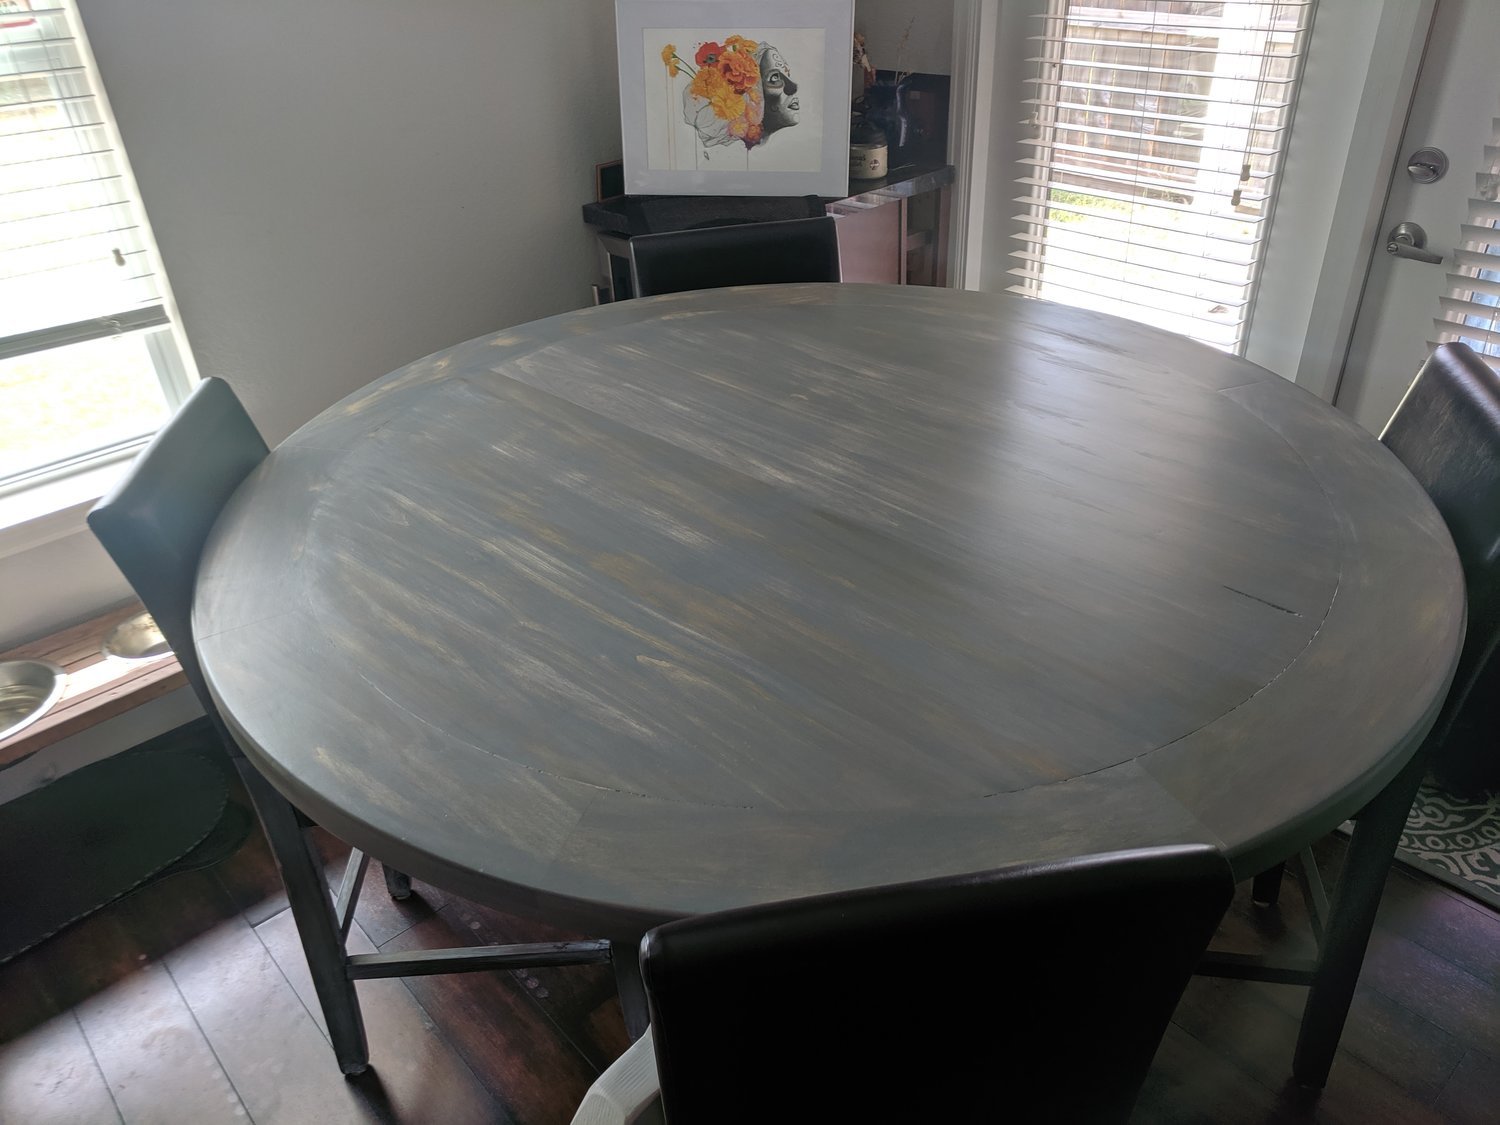
We decided our dining room table could use an upgrade to seat more people for dinner (and of course, for board games). So with limited space in the dining room, we went with a 60” diameter table with a pedestal base. The top is made out of poplar with a weathered gray finish, and the base is douglas fir painted white. It was my first real experience with making multiple circular cuts and nearly resulted in disaster, but with a little patience and some spare wood, I was able to get flush fits.


Shopping List:
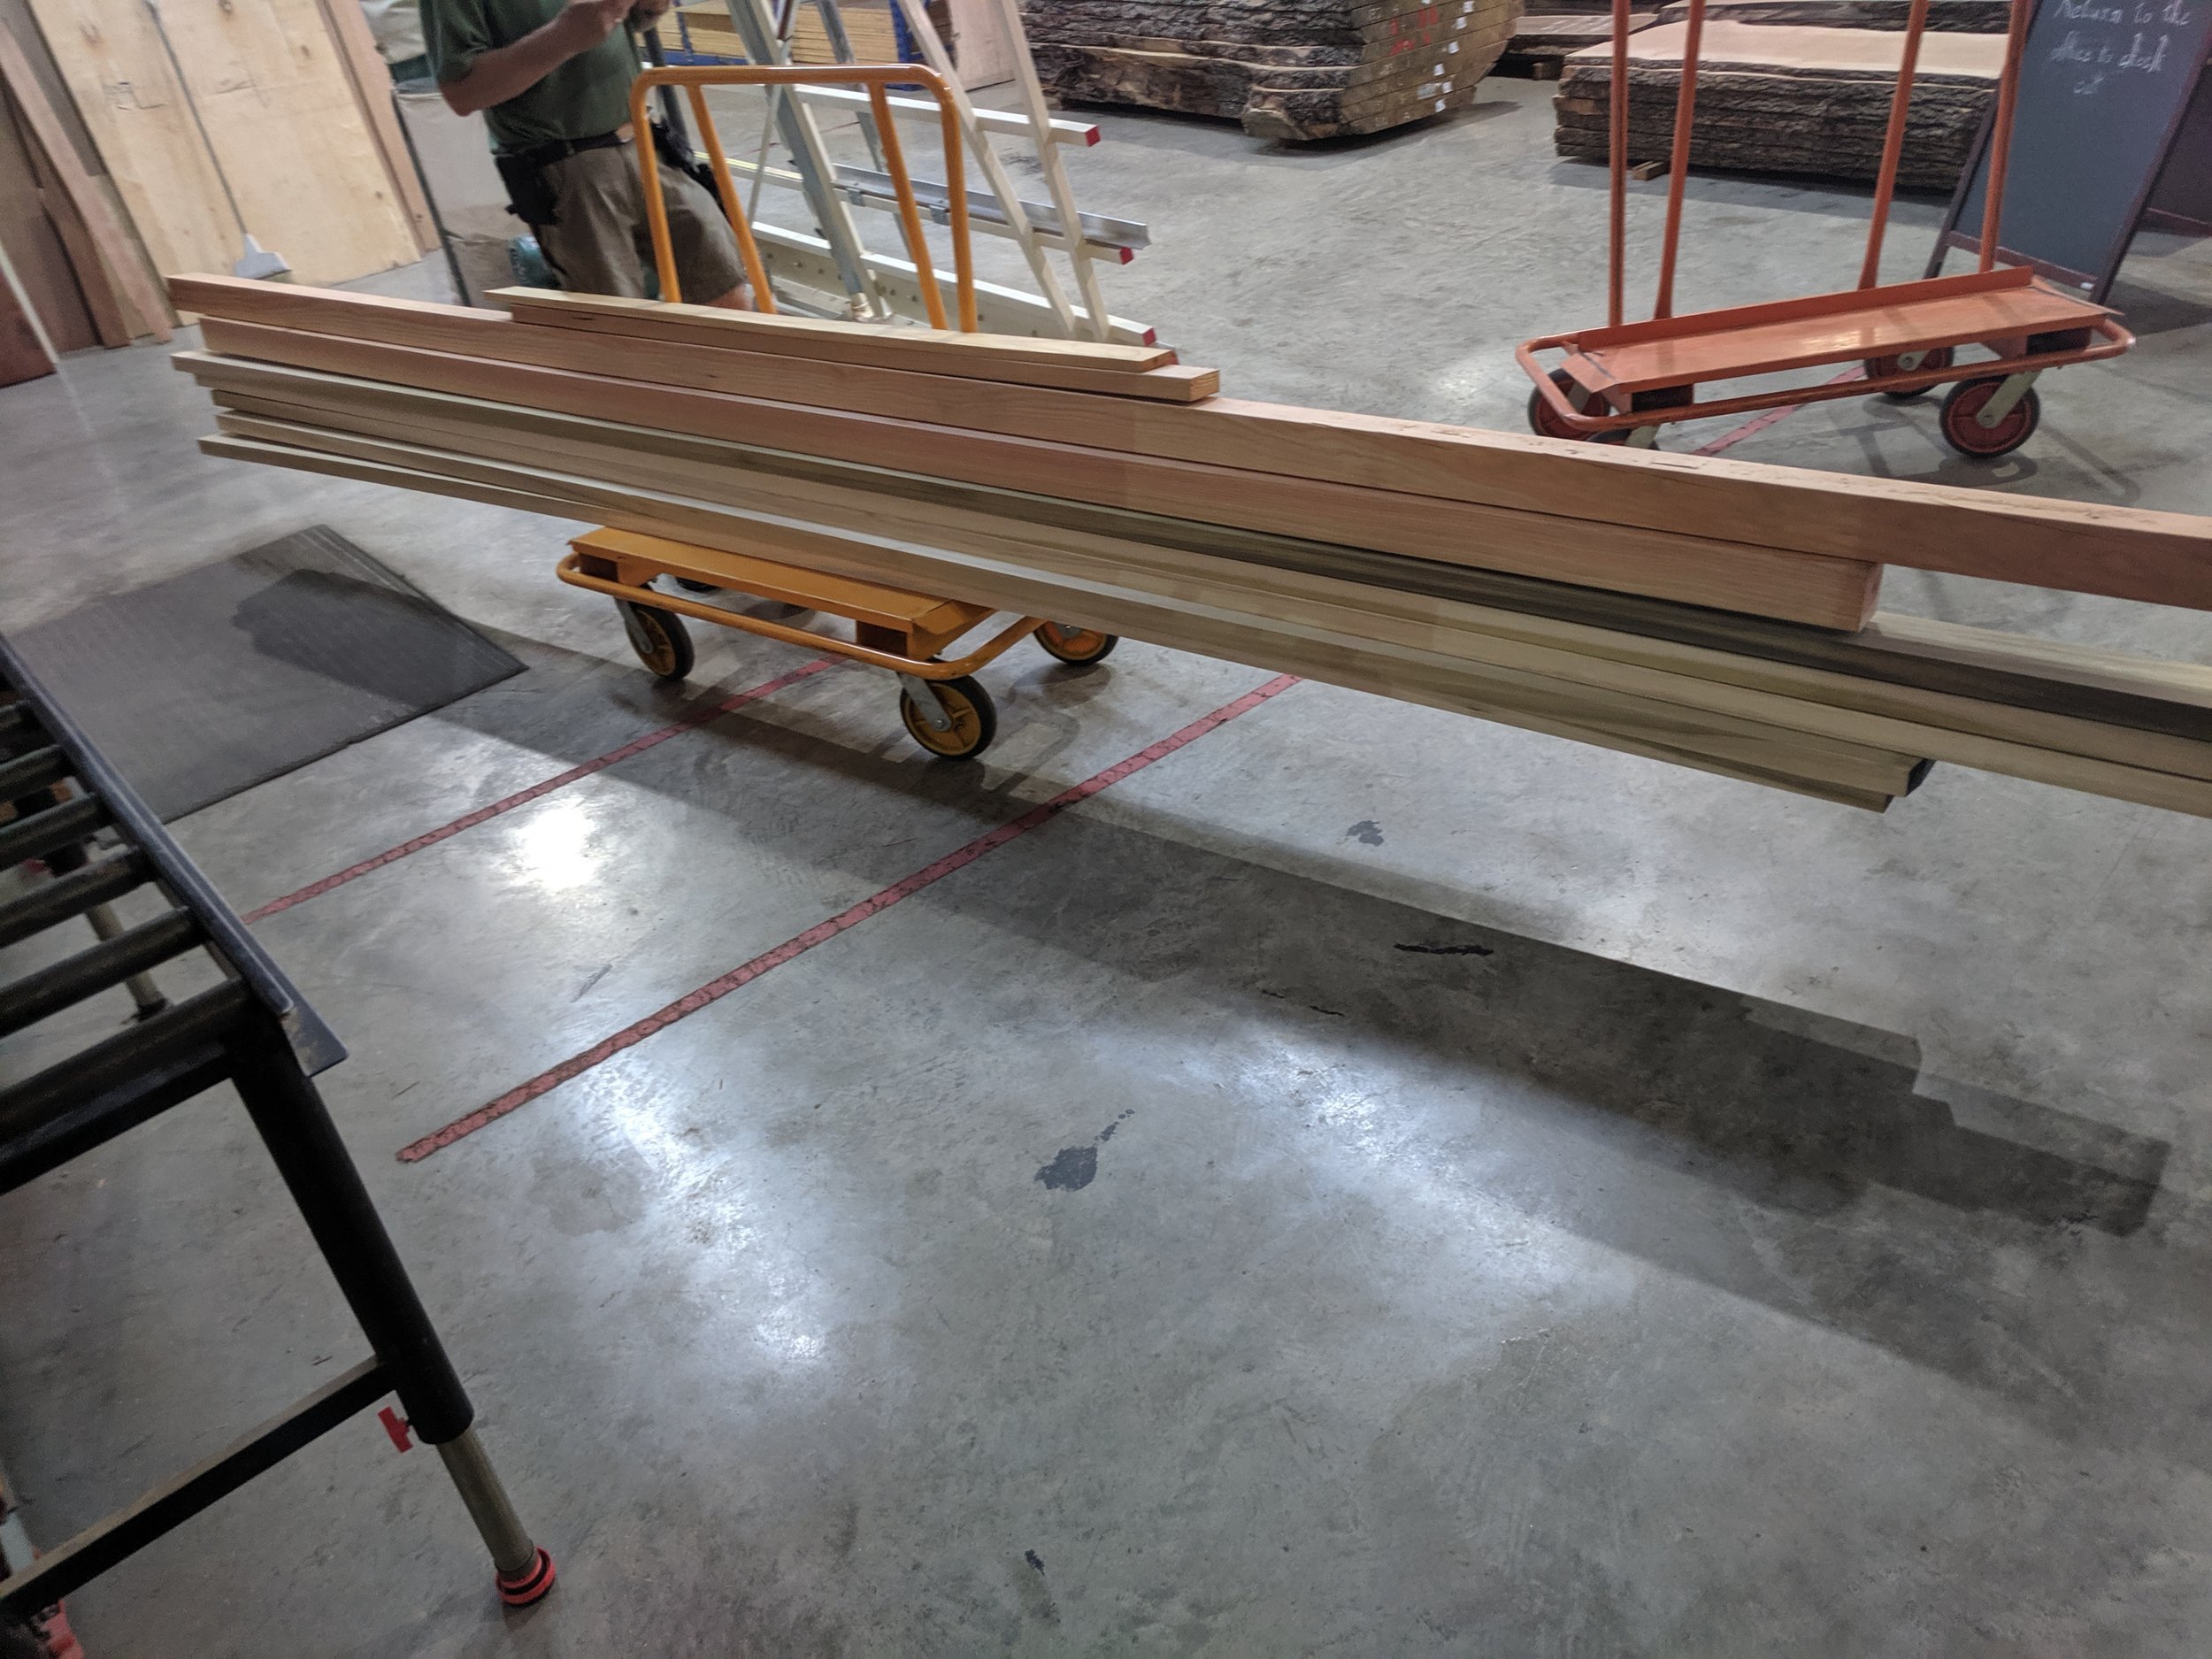
Wood
3 - 9’ 2x6
2 - 8’ 2x6
2 - 9’ 2x8
4 - 8’ 4x4
1 - 6’ 2x4
1 - 6’ 1x4
* The table actually ends up being 58.5” diameter. Which is the closest I could get it to 60” while having minimal waste.
Material
16 - 4” or 5” lag screws w/ washers
Box - 2.25” pocket hole screws
Box - 4.25” wood screws
Box - 2” wood screws
Wood glue


Cut List:
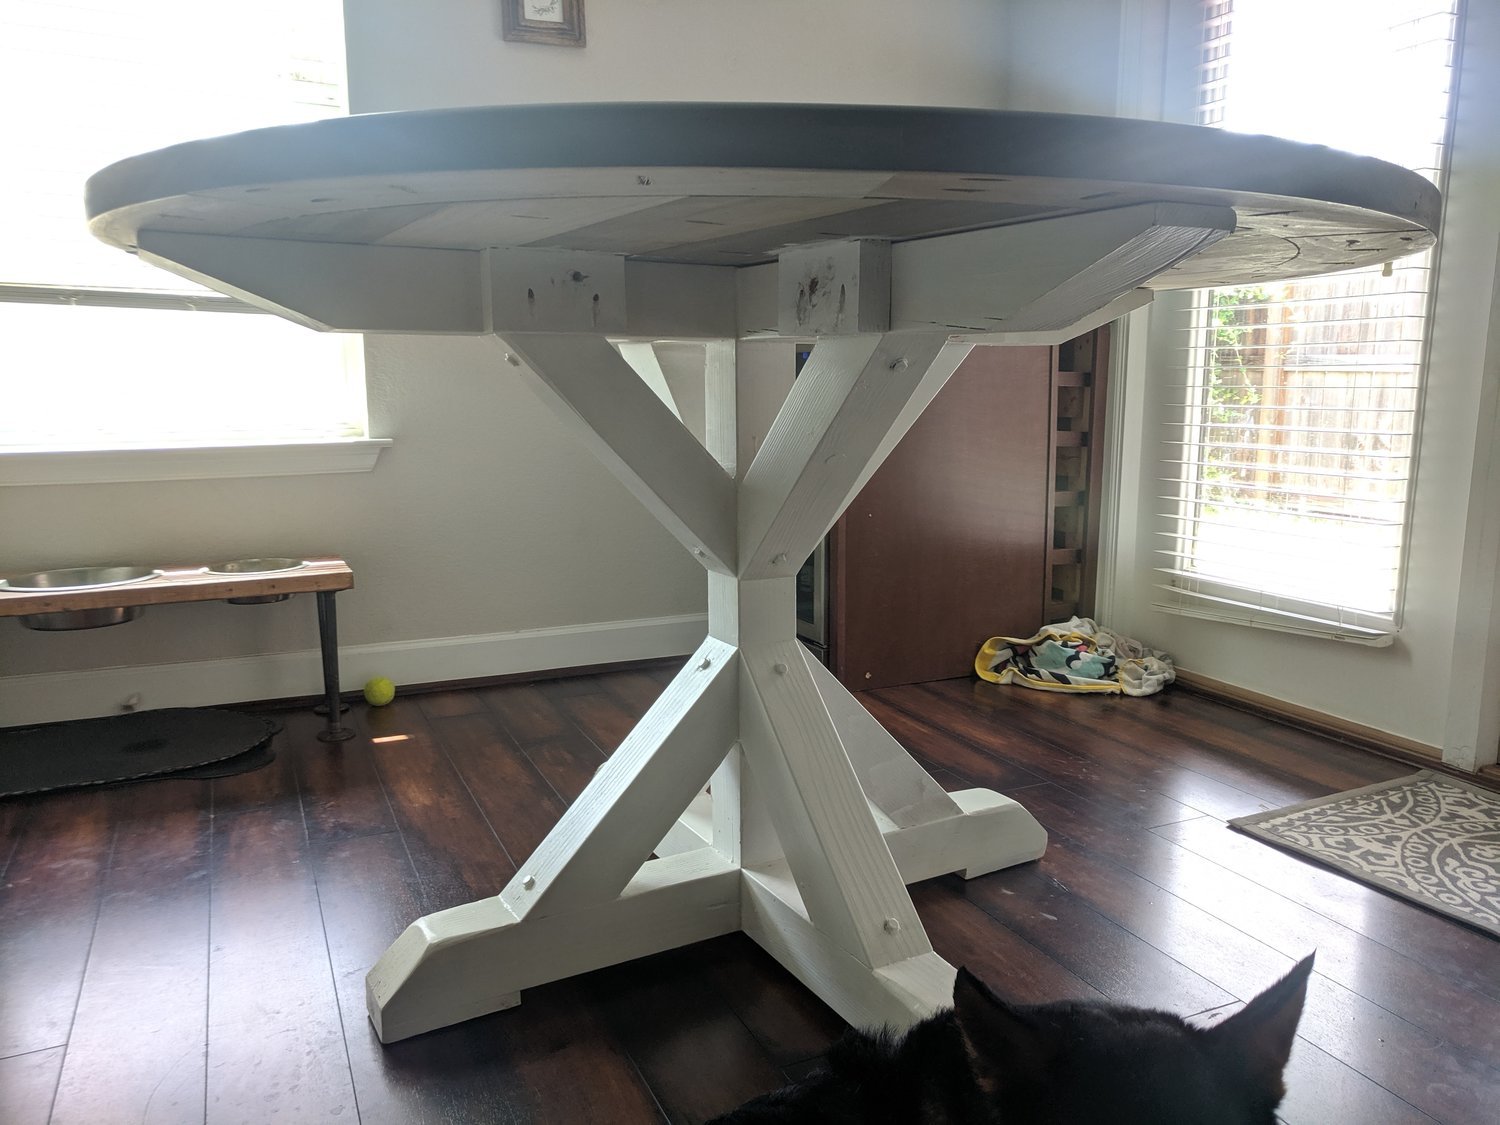
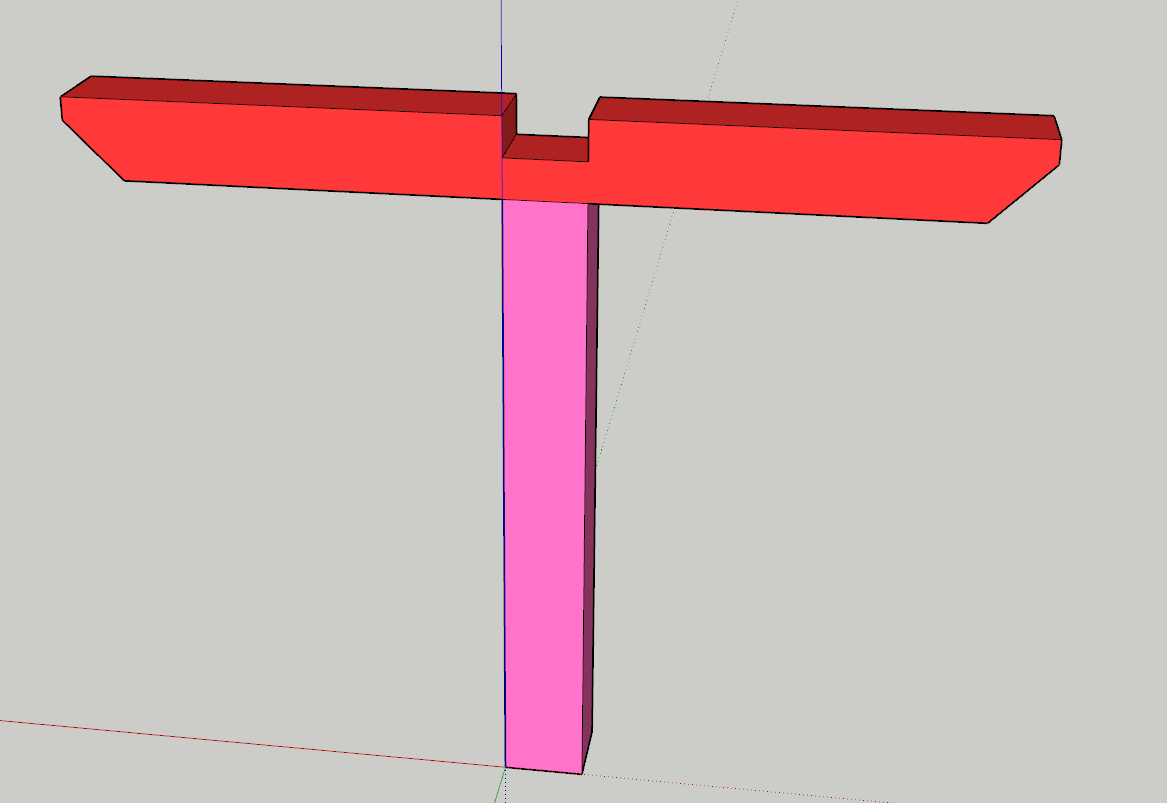
4x4s
2 - 54” w/ 15° taper*
2 - 40” w/ 45° taper*
1 - 27” straight cut
8 - 16.25” w/ 45° cuts
*The angle cuts on these pieces are carpenter’s choice. I ended up pleased with this choice, but I have seen some other tables with different angles or even rounded that look great also.
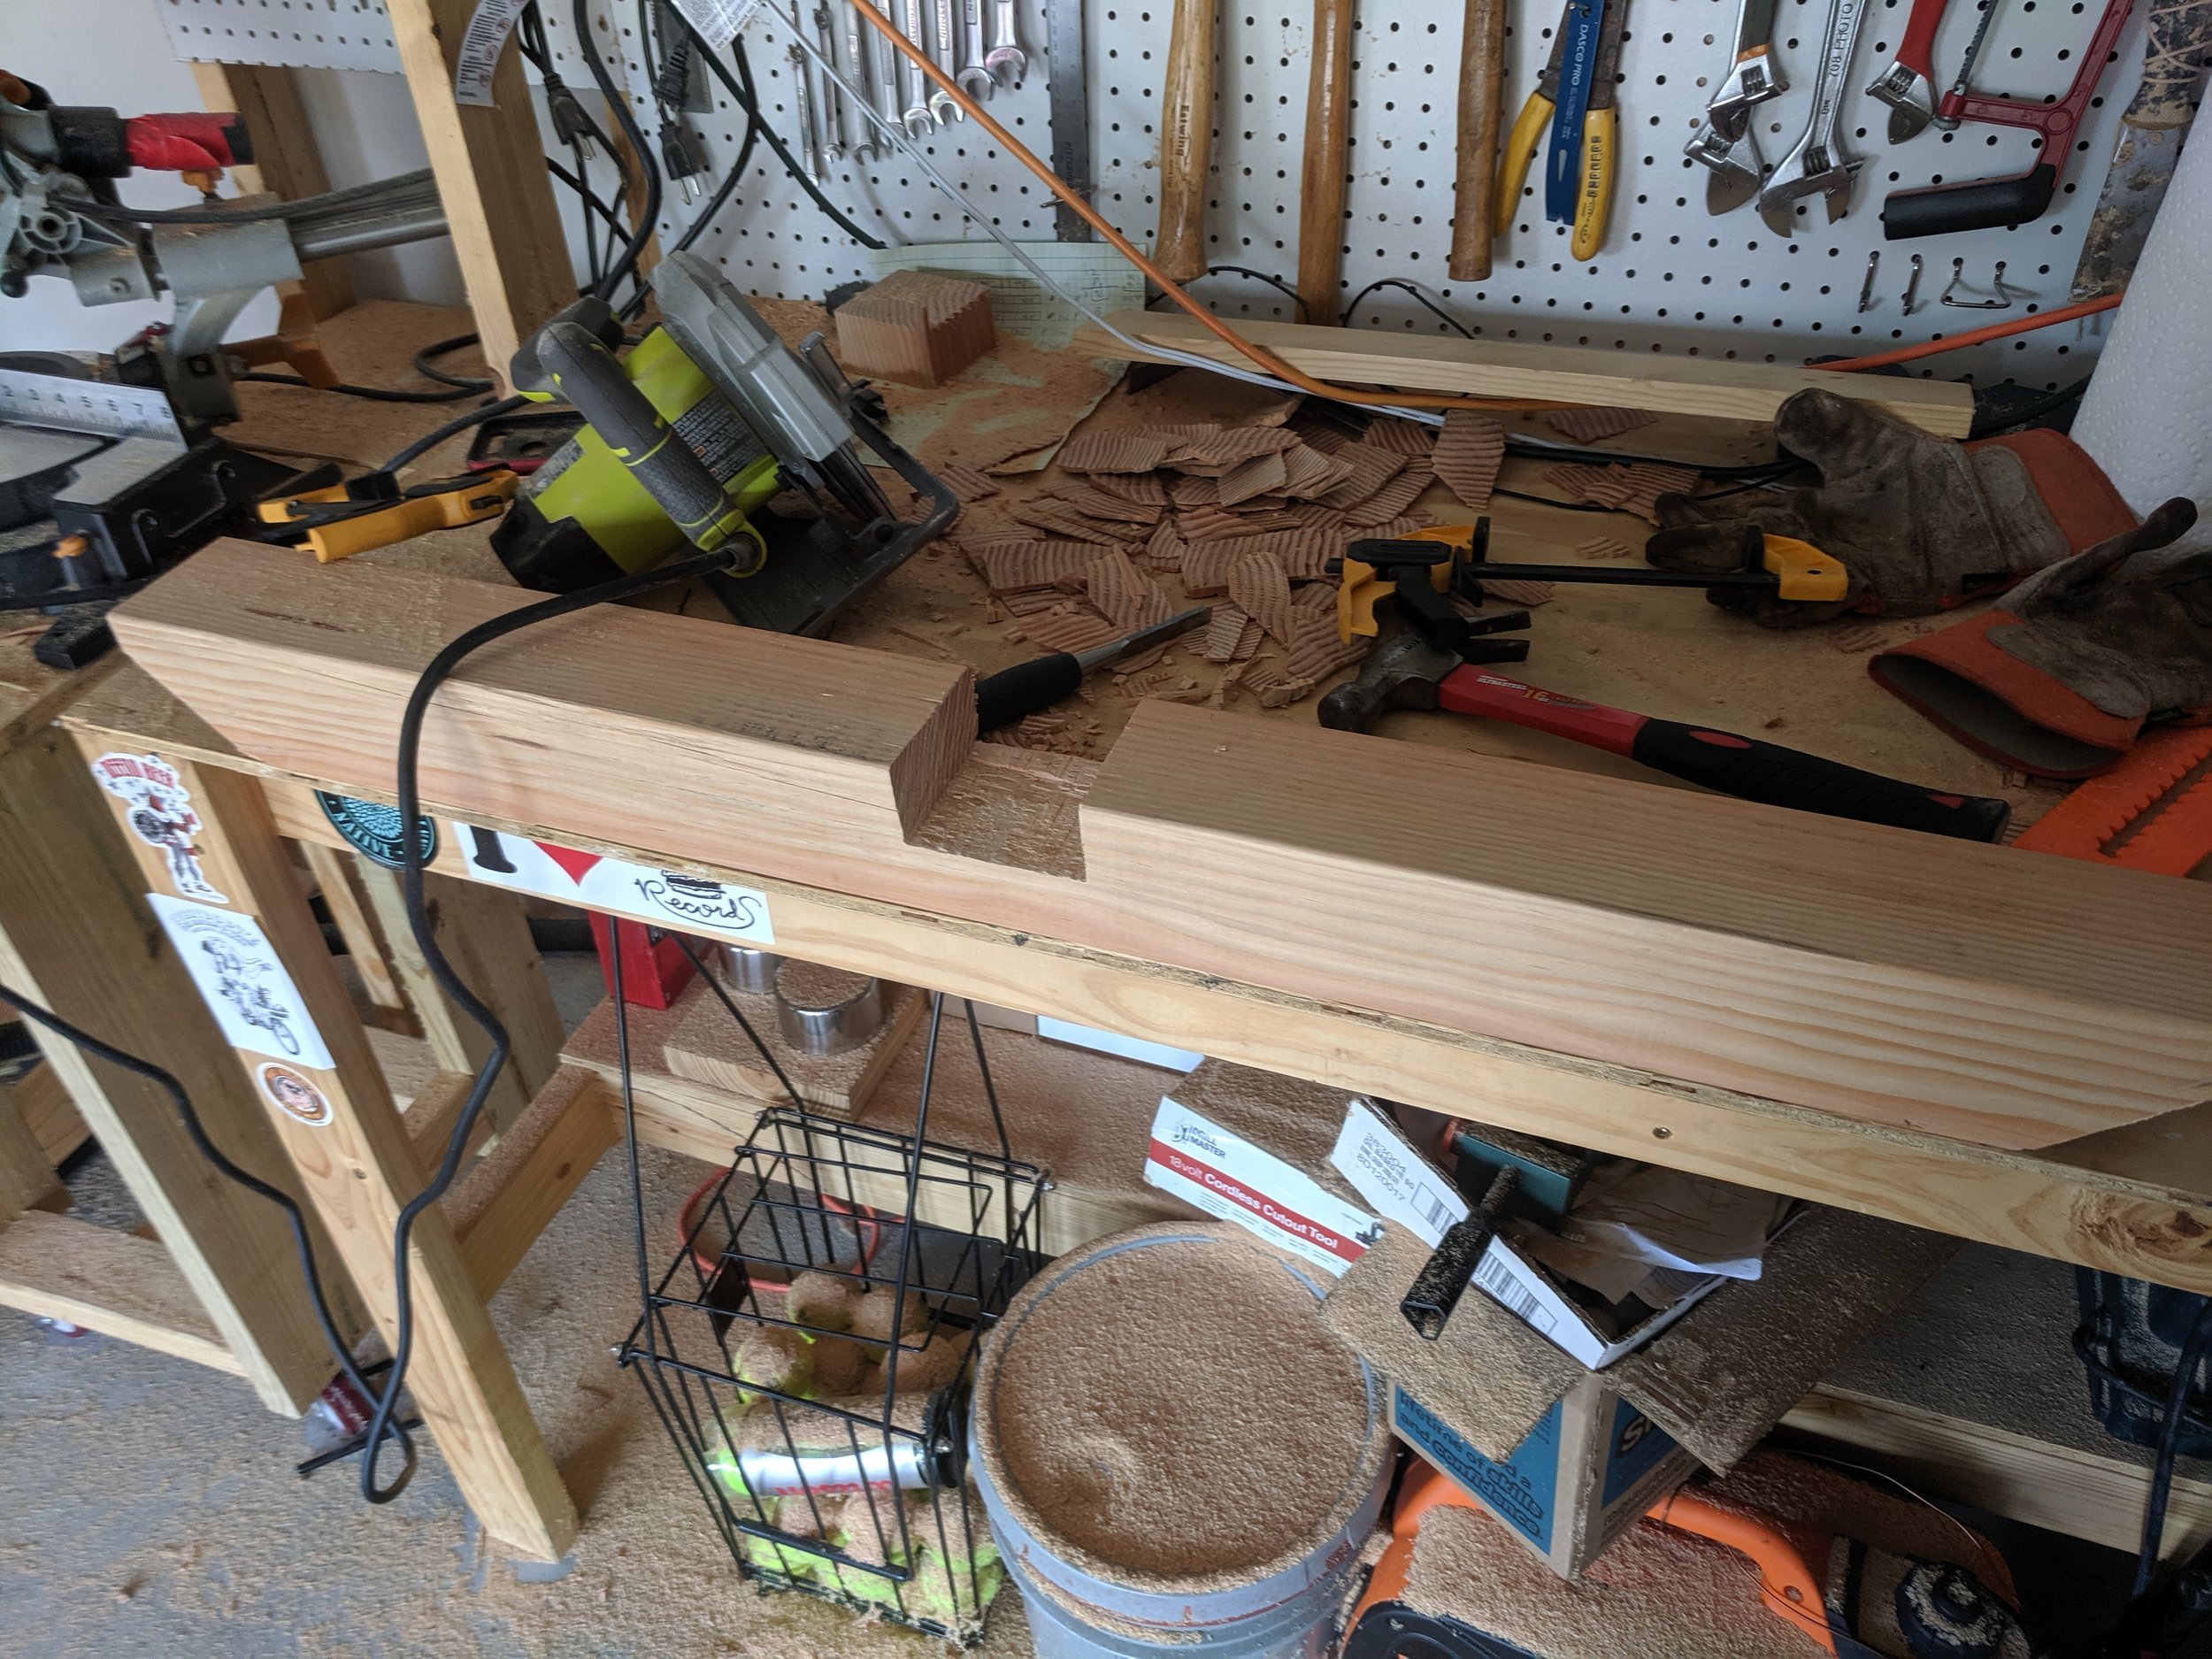
**Please note, on the X supports one piece has a chunk cut out of the bottom and the other has it out of the top. I almost forgot this step but caught it right before making the cuts.
2x6s
5 - 49.5” straight cuts
2 - 40.75” straight cuts
2 - 30.5” straight cuts
2x8s
8 - 26.5” straight cuts
2x4s
8 - 5” straight cuts
1x4s
4 - 6” straight cuts


Tools:
Tape measure
Speed square
Pencil
Safety glasses
Kreg Jig
Drill
Drill bit set
Miter saw
Circular saw
Belt sander
Random orbital sander
Plunging router
Circle jig for router (can be made out of scrap wood)
Step 1:
Attach bottom X support to the stem piece with glue and wood screws.

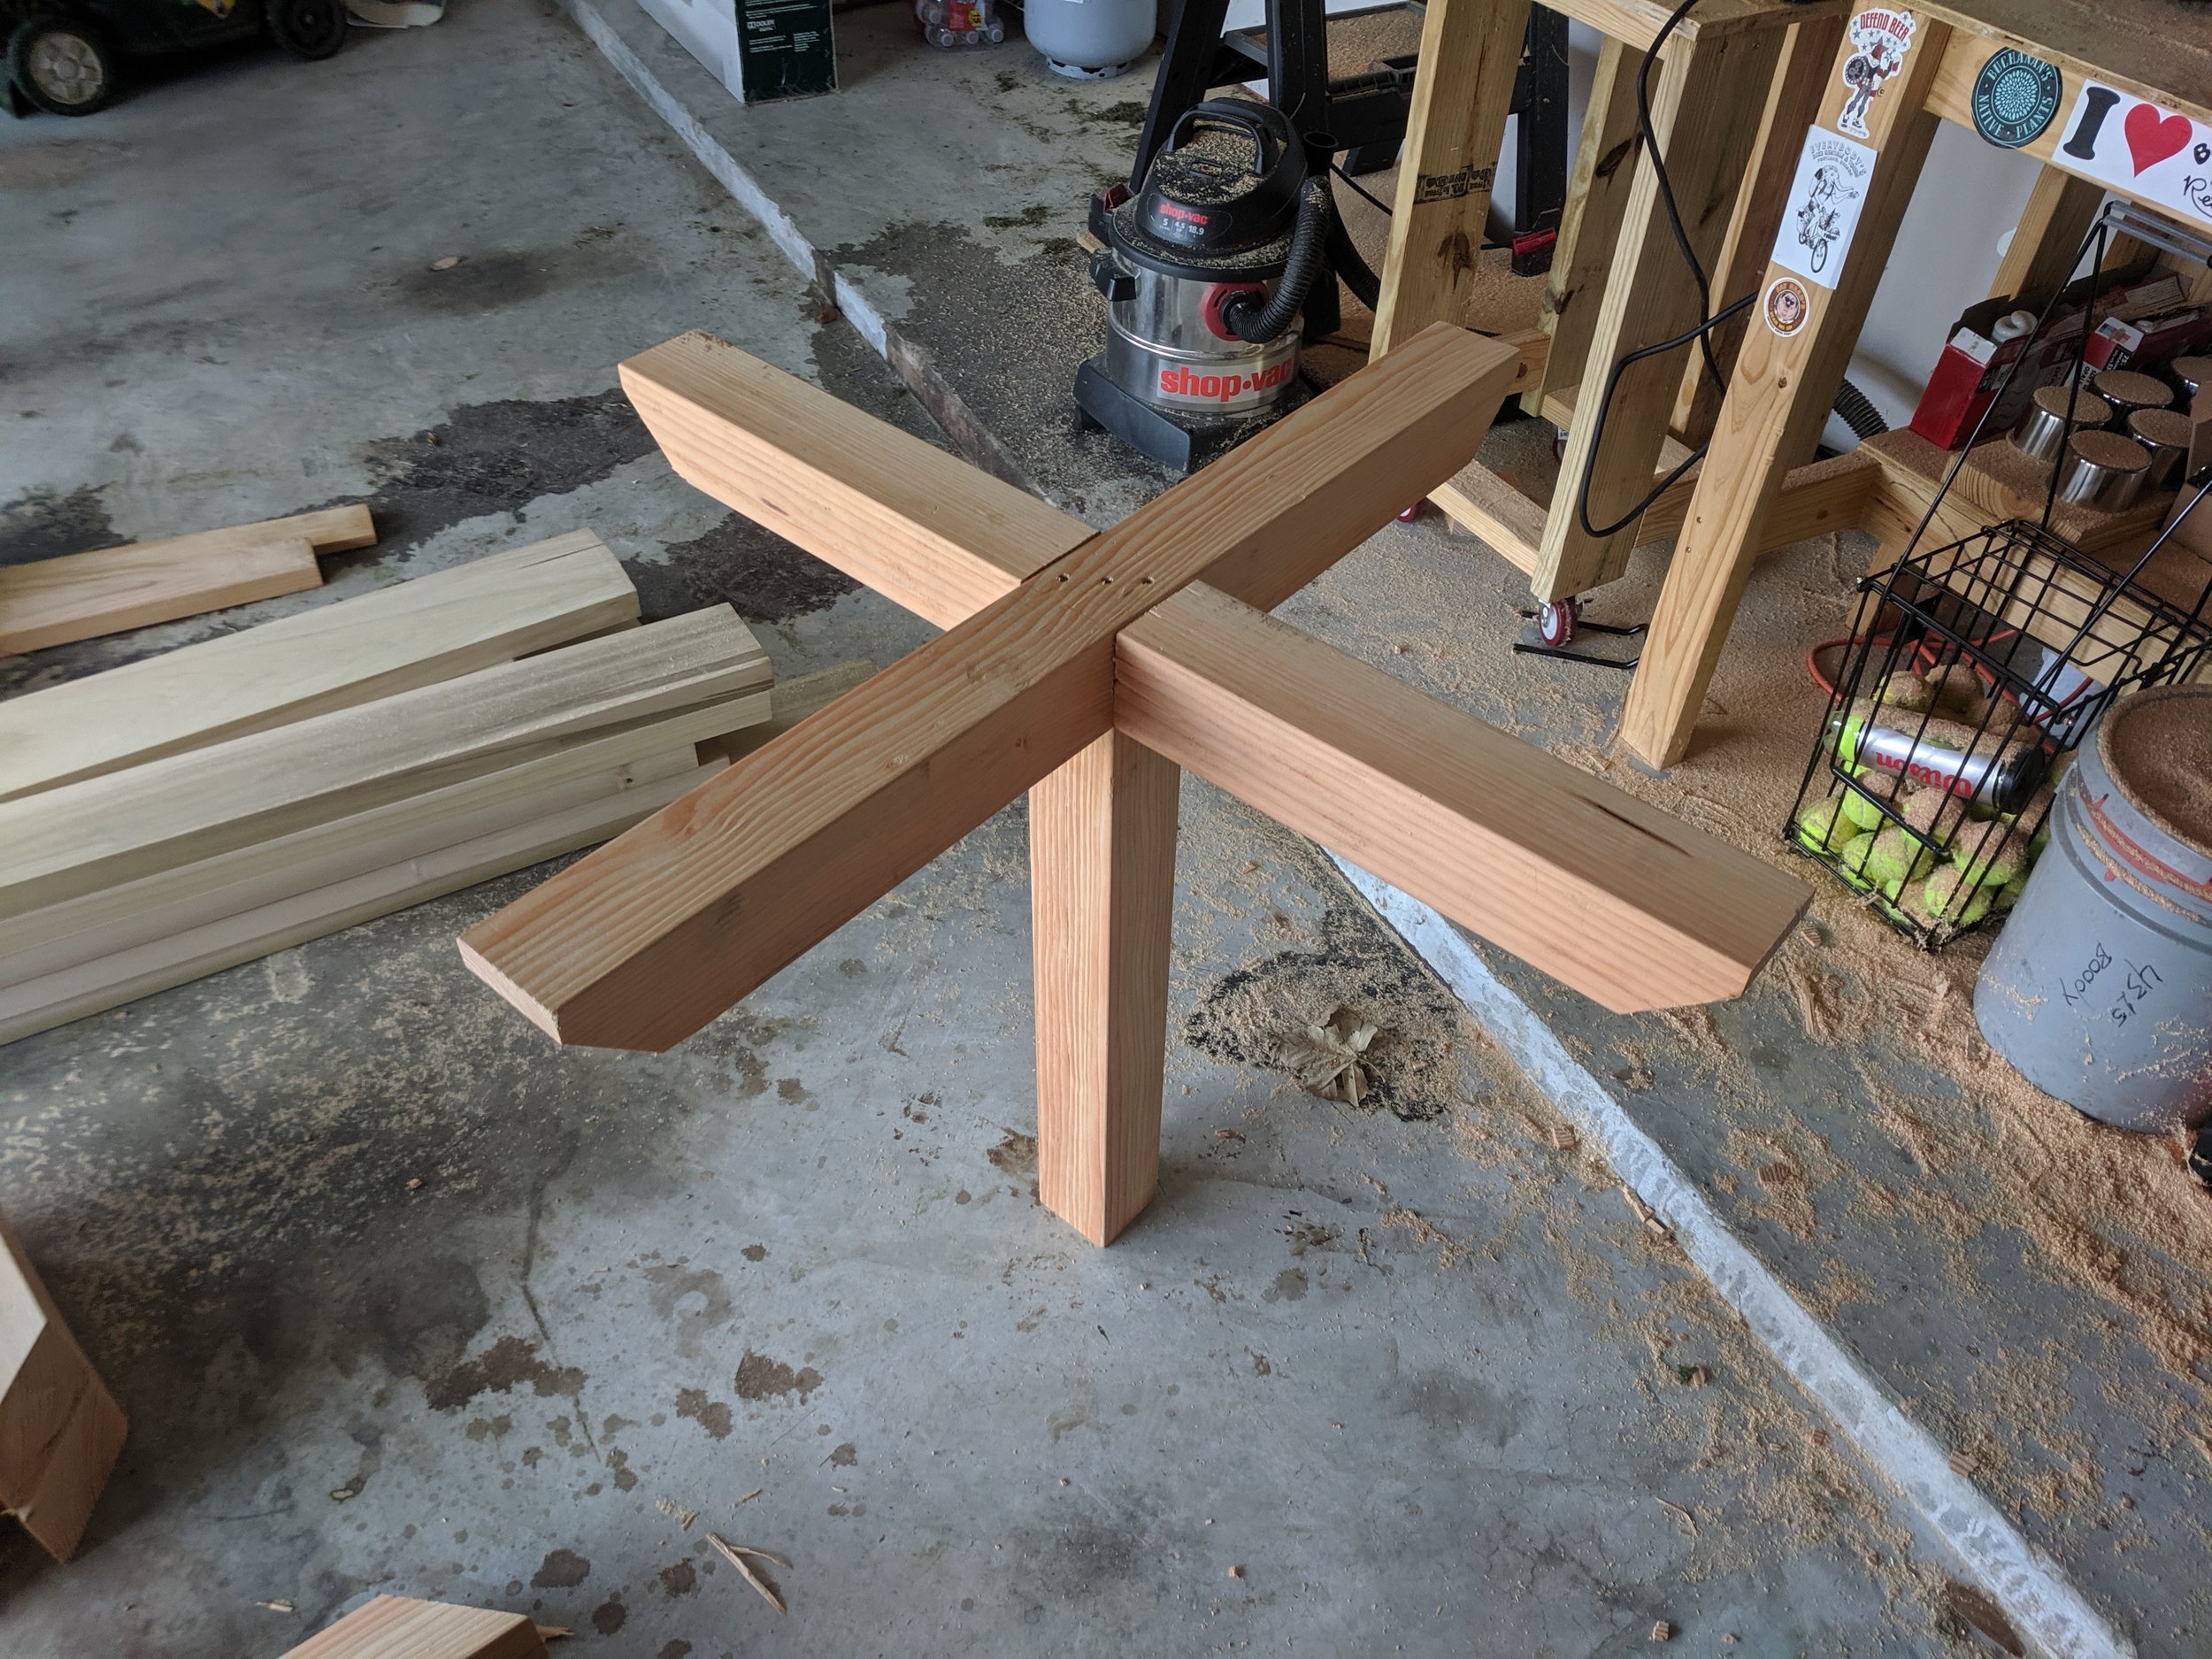
Step 2:
Flip it over and attach the top X pieces the same way.


Step 3:
Attach 45° supports. (I actually did the bottom X and supports before moving on to the top. Either way you should be fine). To attach these, use glue and the lag screws. You will need pilot holes for the lag screws. The size of the drill bit will be dictated by what size lag screws you get. The steps I took were:
1) Clamp one support in place, make sure it is flush with the stem and X support.
2) Drill pilot hole for the bottom part.
3) Remove clamps and add glue to bottom and top portion
4) Reattach support and clamp with the pilot hole lined up
5) Ratchet on the lag screw with a washer
6) Clamp top part the support to the stim
7) Drill pilot hole
8) Ratchet on the lag screw with a washer
9) Move on the next piece
10) You can also attach the feet to the bottom at this step, but I ended up waiting until the very end to do this. You just need to use wood glue and counter sunk screws.


Step 4:
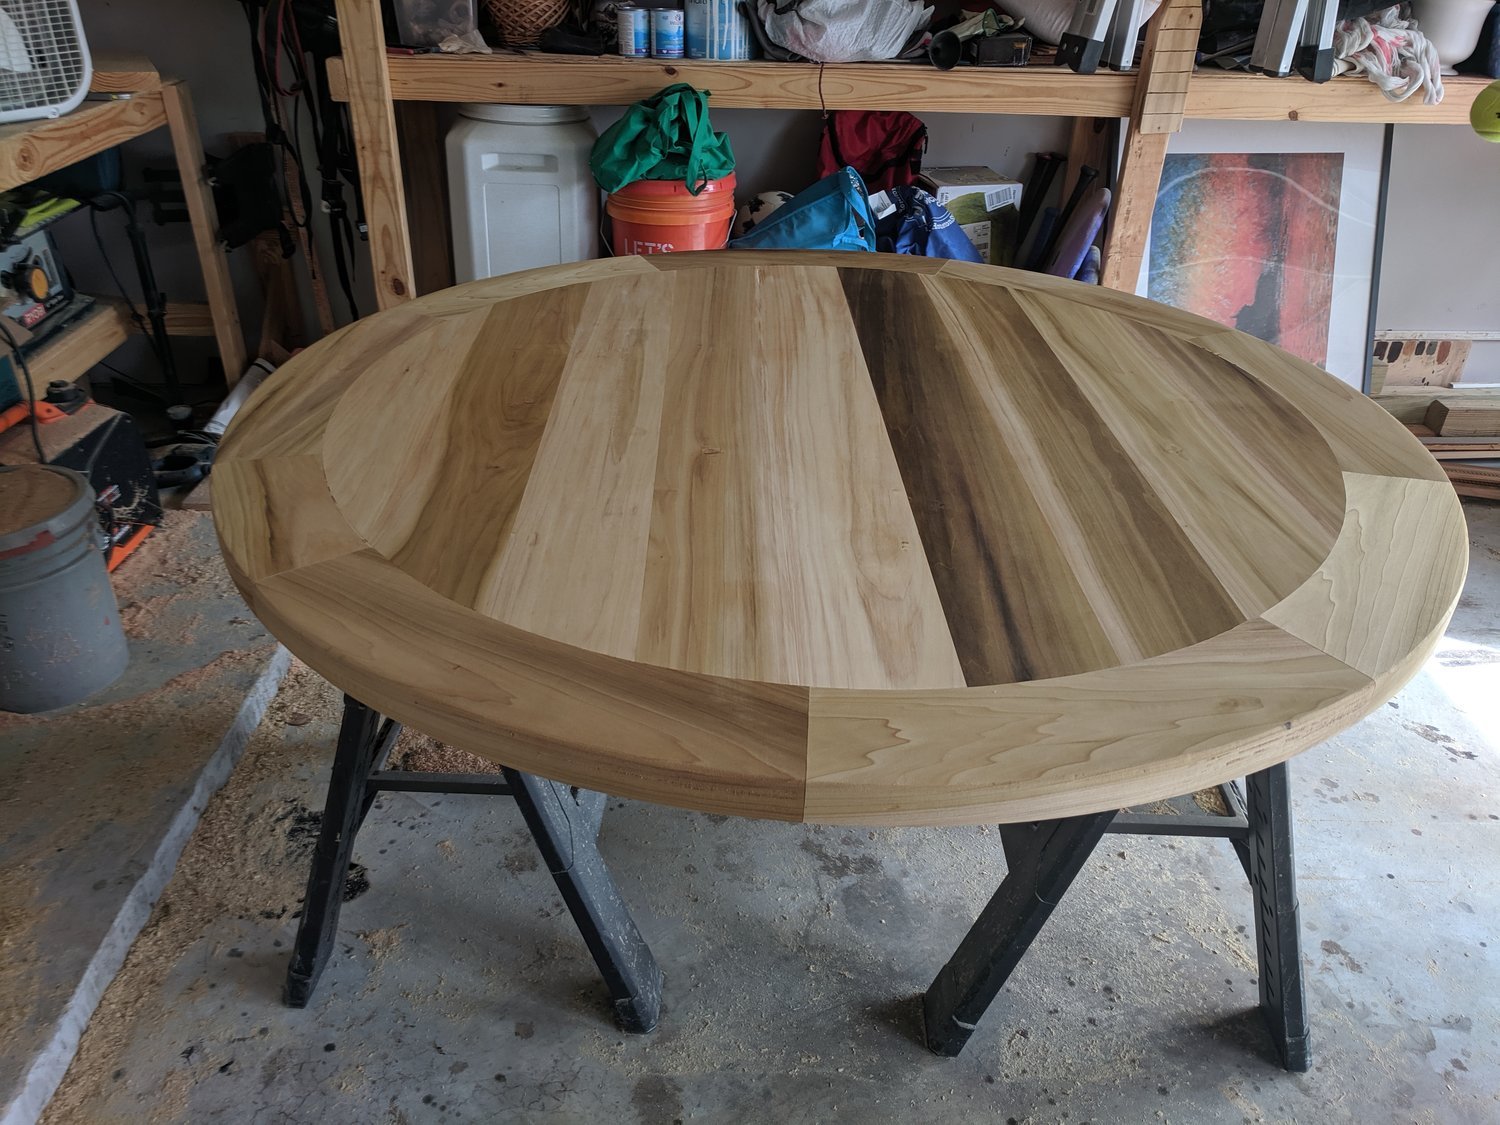
Attach the center pieces of the table. For this, I used glue, pocket hole screws and the Kreg Jig. Also to minimize warping, it is best to alternate grain. Look at the ends of the pieces to see which ones roll up and which roll down. This part does not have to perfectly line up since you will be cutting off the ends with the router later. To help get it generally correct, you draw a line through the middle of the pieces and line those up as you attach each piece. I ended up working it as two halves, starting with the outer pieces, then attached both halves to the center piece. Do not move on to step 5 until the glue is completely dry, which could take up to 24 hours.


Step 5:
Use you circle jig and router and cut a 48.5” diameter from your center pieces. The method you use will be determined by what type of jig you have. I built my own from a scrap piece 1x6 from an old project. I attached the router with bolts on one end and measured the different distances I’d be cutting to drill pivot holes. In the center of the table I halfway hammered in a nail and cut off the top. Then I put the nail through pivot hole and voila, you have a circle jig. Be sure not to try and cut the circle out all on one pass. I ended up having to do 6 or 7 passes for each cut going a little deeper on each one.


Step 6:
And now you are ready for the most difficult part of this. For me it was nearly a disaster, but I was able to come back from it by turning the octagon into a nonagon. After learning from my mistakes, I have corrected the method I used so you can have a much more painless process.
1) Build a table to cut the inner diameter of the border pieces. I used a scrap piece of plywood, 2x4s and screws. You’ll need a 2x4 at the end for the pivot point that is on center of one end, 2x4 in the middle for support, and one at the far end that serves as a stop for the border piece. Make sure your circle jig pivot hole is the proper distance; you are cutting an inside diameter instead of an outside one, so remember to take that into account.
2) Attach the border piece against the stop with the middle of the piece perfectly aligned with the pivot point of the jig. I attached mine through the bottom of the plywood with two screws. Don’t worry about the holes being on the border pieces since we will make sure they are facing the bottom of the table when we attach and will be out of site.
3) Cut the inside diameter by doing several passes with your router and jig
4) Remove screws and repeat steps 1 - 3 for the rest of the pieces
We now will obtain the proper angles on the ends of the border pieces for them to fit together.
5) Boost the inner part of the table with scrap 1x pieces. This makes us able to have contact with both upper and lower stacked pieces of the border in the next step.
6) Alternate stacking border pieces around the inner part of the table. The spacing will be close, but you should have a little bit of overlap.
7) Tie a string around the pivot point in the middle of the table and pull it out to where border pieces meet.
8) Mark a line on the upper piece, and keeping the string in the same place, take the upper piece off and mark the bottom piece.
9) Work your way around the table and do this for each border piece
10) Take each piece to the miter saw and ever so carefully, cut down each line. I marked each intersection so they could be easily realigned when being put back together.
11) Take the booster pieces out from under the table and place the border pieces around it. If all went well, they should be flush. If not, don’t panic. Strategically sand your pieces down to get them to fit.

Step 7:
Attach the border pieces. Use glue and pocket hole screws, using two screws to attach to the table and two to attach to another border piece. Allow the glue to dry before moving on to the next step.

Step 8:
Cut out the outside diameter of the table with the circle jig. You should be a pro at this by now. Be sure to take your time and go slow. The outside diameter will be part of your show piece.


Step 9:
Now you will add some support to the table to top so it can attach to the base. Flip the base upside down and put it on top of the table. Line up exactly where you want it. Attach 2x4s to the table top with glue and pocket hole screws. Allow dry time. I bought bolts to attach the base to the table top through these supports but ended up not using them since it was secure enough for our use.


Step 10:
You are now structurally complete! Finishing it is carpenter’s choice. I puttied up all the gaps, sanded down to 120 grit, wood conditioned, used weathered gray stain on the top and white paint for the base, and did six coats of poly on top sanding with 220 grit between coats.
Good luck on your journey!!